
Last Updated on September 22, 2023 by Christopher G Mendla
This is a quick example of the GMIC Pencil Portrait plugin for Gimp.
About Gimp and Gmic
Gimp is an open source / free image manipulation application with capabilities similar to Adobe Photoshop. However, unlike Photoshop, it is free. There are excellent plugins available for Gimp that will allow you to perform all types of image manipulation and editing. One of these is the GMIC plugin for Gimp. You can download the Gimp version of GMIC.
Once you get it installed, it should be an option under your tools menu.
The example – an old train station
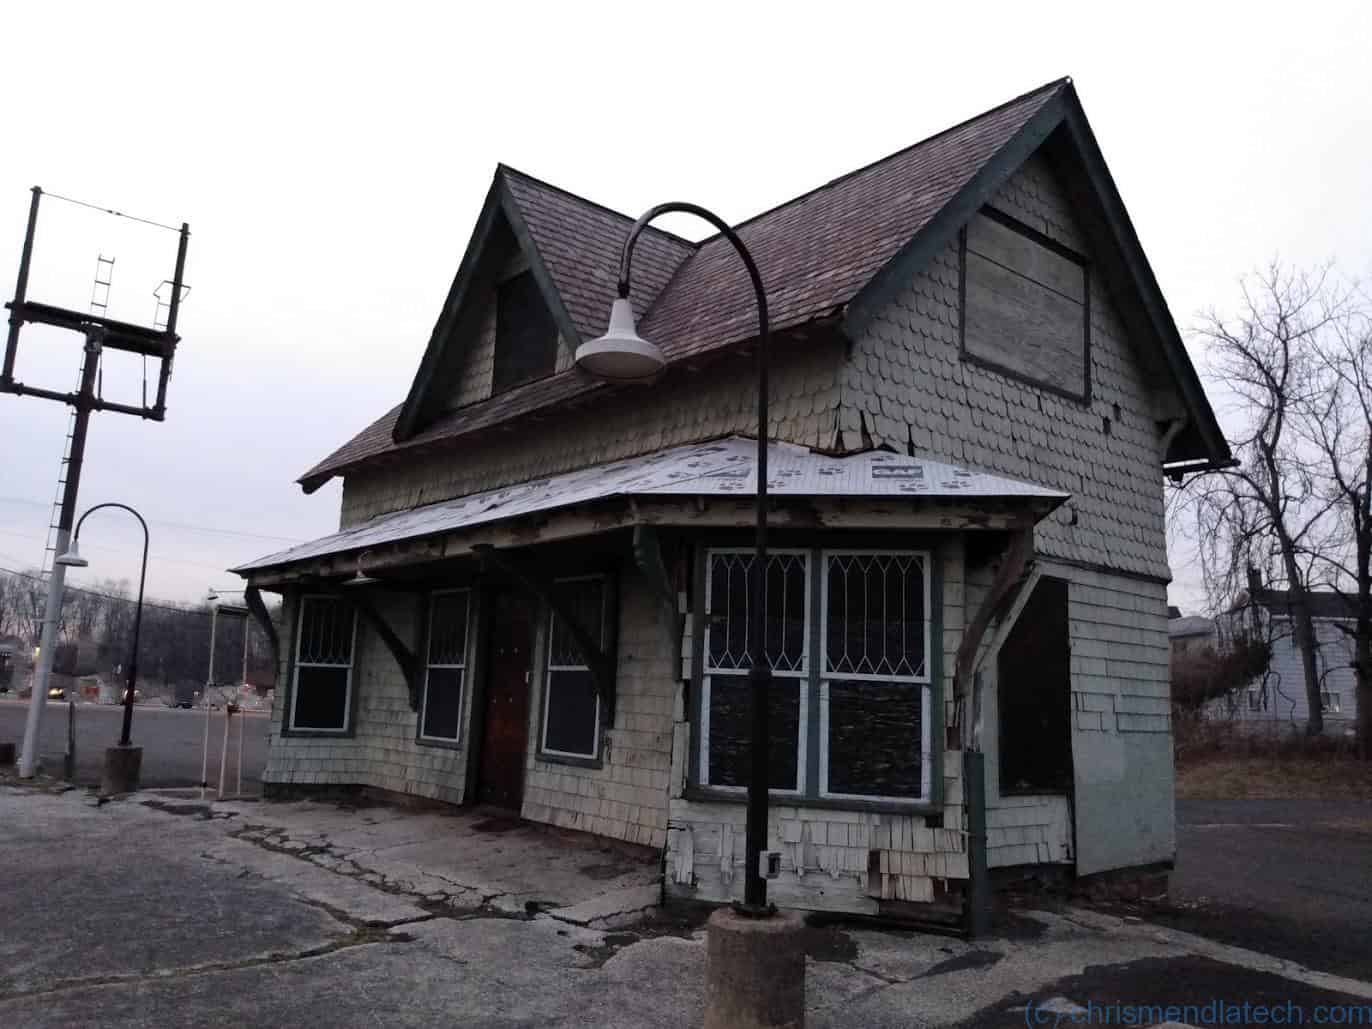
There is a train station in our neighborhood that was built in 1892. I’ve shot pictures of it before. It is currently in a sad state of deterioration. I was grabbing some parts from the hardware store and decided to take some quick pictures of the station with my cell phone. It was late evening and I thought the twilight might make for some interesting lighting.
When I looked at the images later, it wasn’t quite what I was hoping for. They seemed a bit bland. Also, the exposed sheathing on the roof was a bit of an anachronism.
Playing with the color balance and contrast would probably not do much for that photo. I considered making it a black and white and adding some grain to look like an old photo. GMIC provides a LOT of filters.
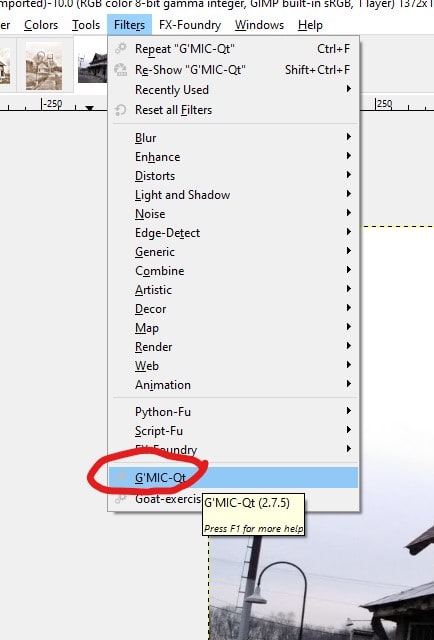
Launching GMIC
If you have GMIC properly added to GIMP, you should see it under your Tools Menu
Applying the Filter
When GMIC is launched you can see and test all of the available filter options. As you can see, the list is extensive. I knew I wanted a black and white or monochrome effect. I simply clicked on different options until I found one that I liked. That was the Black and white – Pencil Portrait.
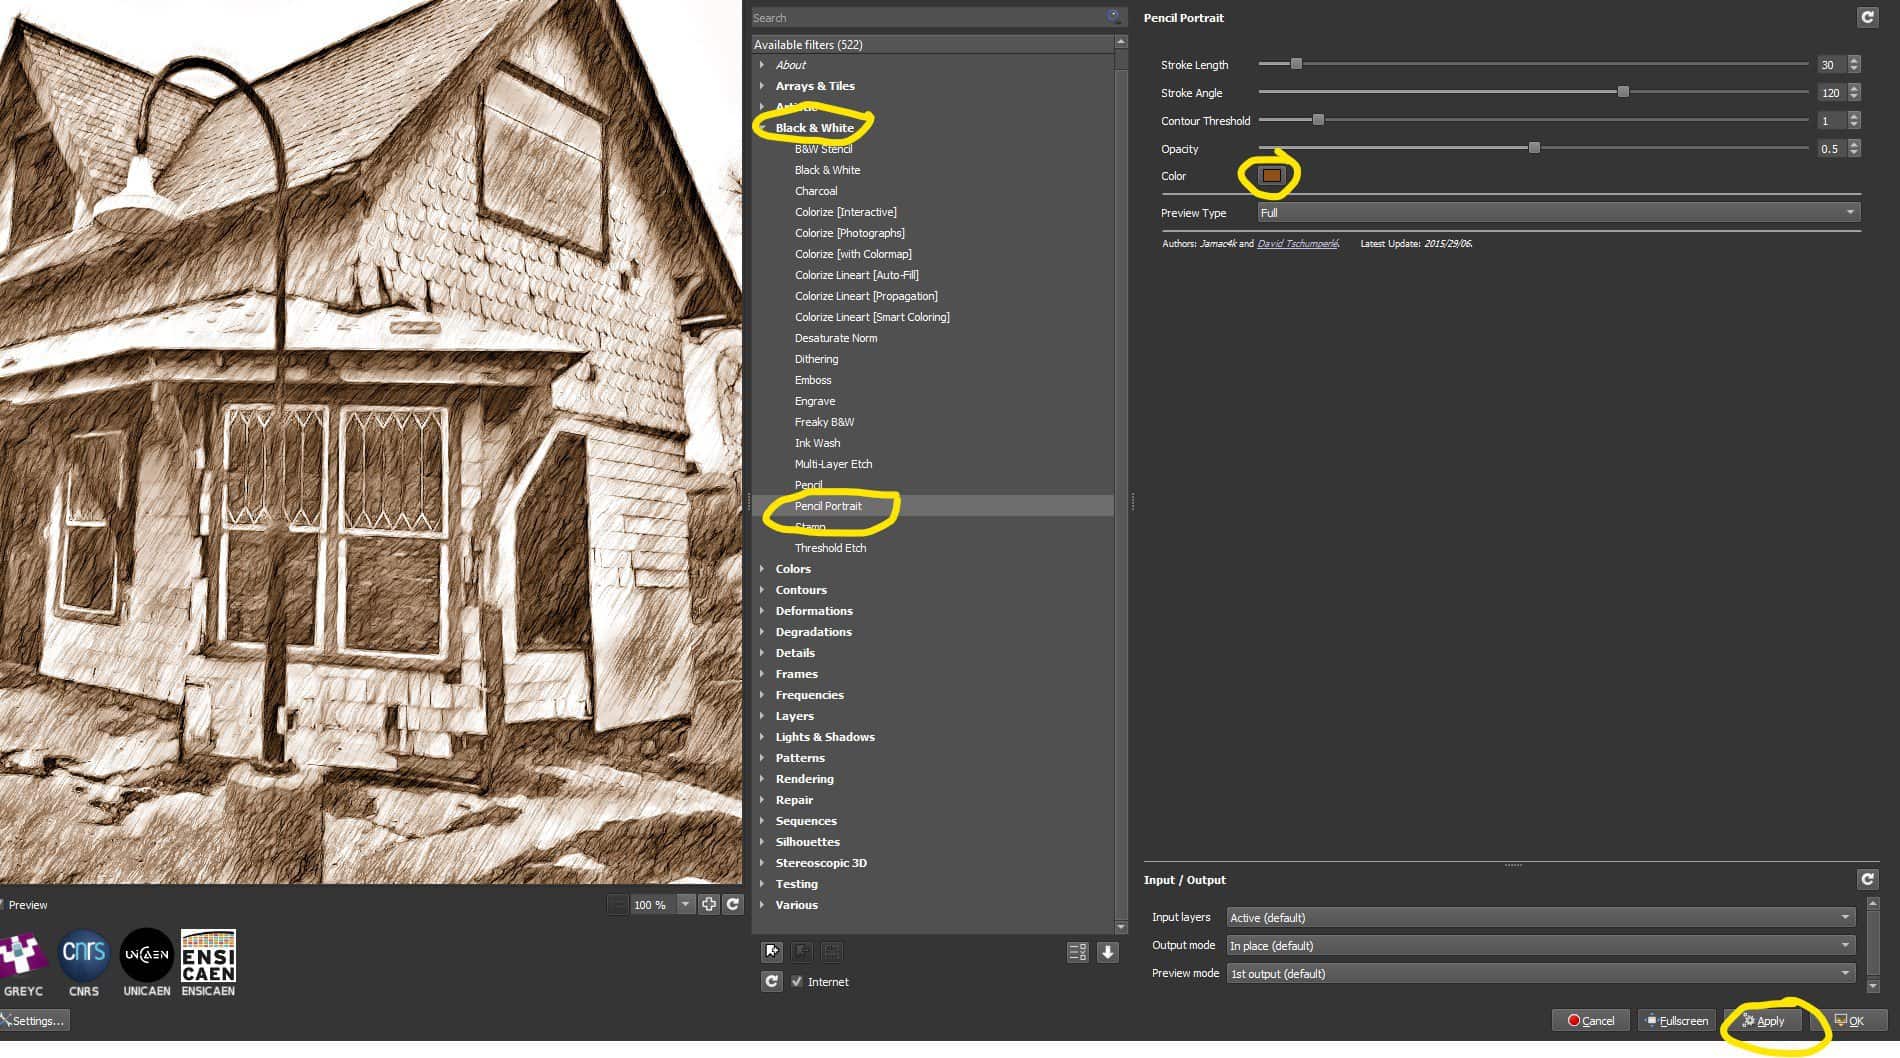
I liked the look so I applied it, hit OK and was back to Gimp. I exported the image in .jpg format. Note that there are a number of settings in the top right for this particular filter. I could have spent some time trying them but the default settings gave me what I wanted.
If you are applying a black and white or monochrome filter to an image, you might want to enhance the brightness and/or contrast before applying the filter.
The Result
The result was as follows:
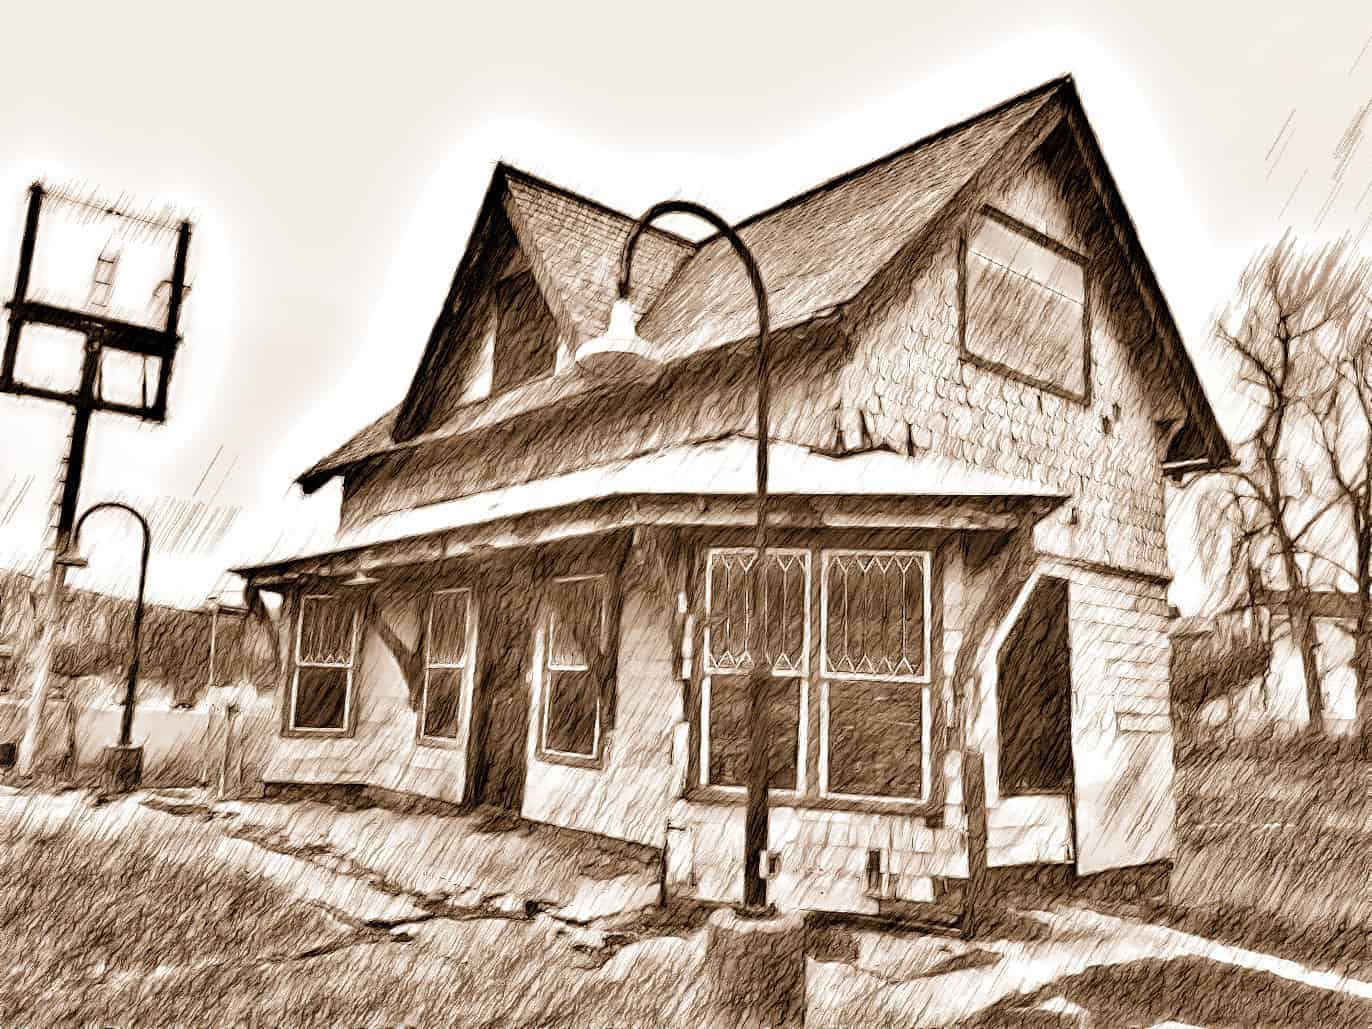
I applied the same filter to several images of the station. You can see the full results here. I believe that, in this case, changing the image to a pencil sketch makes it a lot more interesting.
The name of the Gimp project may be changing at some point as there are negative connotation to that particular word. GIMP stands for “Gnu Image Manipulation Program”
Additional Tips
- The options with GMIC are almost endless. Don’t fall into a rabbit hole trying them all… unless you want to 🙂
- Be sure to save copies of your original images. You probably don’t want to overwrite your original with a filtered version.
- You might want to do some pre-processing. There were cars and buildings in a couple of the photos that I wanted to remove. I used Inpixio’s Photo Eraser for that. It is a little fast than GIMP in my opinion. Also, you don’t need to be too critical when erasing unwanted parts of the image as the pencil sketch filter will ‘smooth’ things out.